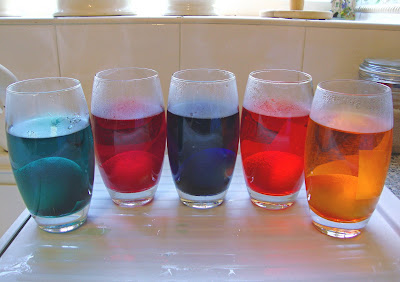
Paula's step by step guide to colouring eggs with the Podlings
Step 1. Assemble your children in the kitchen
Step 2. Gather the egg dyeing paraphernalia.
(We were lucky this year as we had some proper egg colouring dye papers that the Podlings' grandparents brought back from Germany. I have never had such vibrant colours in our eggs before. We have decided to send Nanna and Grandad to Germany again next year to get more dye papers!)
Step 3. Boil your eggs. Your children will get very bored at this point and wander off. You conclude that you should have done Step 3 before Step 1.
Step 4. Put one dye paper and 2 tablespoons of vinegar in half a pint of boiling water. Pop your hot eggs in and leave them until you get the depth of colour you desire. Accept that your kitchen will smell of vinegar for the rest of the afternoon!
Step 5. Find some way of distracting your children while waiting for the eggs to cool enough to be handled. We worked through our Easter Story Sticker Book,
Step 5. Decorate your eggs. We used the German Easter transfers, as well as some normal stickers. Let the baby have a go! If you prefer, you can take the completed egg away from the baby as soon as she has finished decorating it. Alternatively, you could do what I did and let her drop it on the floor and crack it.
.


No comments:
Post a Comment